Have you noticed your home’s air feels less crisp, your energy bill is creeping up, or your AC is struggling when the heat kicks in, and thought maybe “it’s just this summer”? The real issue could be your HVAC coil quietly underperforming, pushing your system into overdrive.
According to a study by the National Institute of Standards and Technology, improper installation and component faults can increase a home’s space-heating and cooling energy use by around 30%. That means what seems like “just inefficient cooling” could hide a much larger cost waiting to hit your utility bill, or worse, lead to a system failure.
Knowing the HVAC coil replacement cost is the next natural step, because understanding what you’re paying for helps you catch early warning signs, prevent unnecessary expenses.
In this blog, you’ll find a clear breakdown of what impacts those costs and how to decide the best course of action for your system’s long-term performance.
Key Takeaways:
Spot early warning signs: Subtle drops in cooling or rising energy bills can signal coil trouble long before a full breakdown.
Know your system: Understanding the difference between evaporator and condenser coils helps you identify the real issue and avoid unnecessary repairs.
Understand real costs: Coil replacements typically range from $600–$2,700, depending on access, size, and system type; knowing this helps you plan smart.
Choose expertise over shortcuts: Hiring a licensed, local contractor like Abba HVAC ensures accurate diagnosis, safe installation, and long-term reliability.
Be informed during service: Knowing what happens during a replacement gives you confidence and prevents hidden costs or poor workmanship.
Save smartly: Simple steps like off-season scheduling, comparing full estimates, and maintaining clean coils can lower your overall repair and energy costs.
What Is an HVAC Coil? Evaporator vs Condenser
An HVAC system uses two heat-exchange coils working together to move heat out of (or into) the home: the evaporator coil (located inside the building) and the condenser coil (outside). One coil absorbs heat from indoor air; the other rejects that heat outdoors.
Although they look similar, their roles, failure modes, maintenance needs, and replacement complexity differ. Those differences precisely determine performance, repair urgency, and cost.
Below is a quick, easy comparison to spot which coil is likely the problem and why that matters for repair or replacement.
Feature | Evaporator Coil (indoor) | Condenser Coil (outdoor) |
|---|---|---|
Location | Inside the air handler/plenum. | On the outdoor condensing unit. |
Primary job | Absorbs heat & moisture from indoor air (cools + dehumidifies). | Releases heat to the outside (condenses refrigerant). |
Construction | Copper/aluminum tubing with fins; often inside a cabinet. | Copper/aluminum tubing with fins; exposed to weather and airflow. |
Common failure modes | Pinholes/formicary corrosion, refrigerant leaks, freeze damage, and clogging from indoor debris. | Bent fins, outdoor debris clogging, corrosion (mainly coastal), and physical damage. |
Typical symptoms | Weak cooling, ice on coils/lines, hissing (leaks), high indoor humidity, odd smells. | Reduced cooling, loud operation, visible dirt/debris on coil, and higher head pressures. |
Maintenance focus | Clean return filters, ensure condensate drains, professional coil cleaning, and control indoor contaminants. | Rinse/clear outdoor coil, remove debris, straighten fins, and maintain clearance around the unit. |
Replacement complexity | Often more labor-intensive — may require cabinet access, brazing lines, system evac/recharge. | Usually more accessible but still requires brazing, vacuuming, and recharging if refrigerant is involved. |
Key cost drivers | Coil fit/type (OEM vs aftermarket), cabinet modifications, refrigerant type, and access. | Coil size/configuration, damage level, and need to replace related components (compressor, fan). |
Understanding how each coil functions also helps explain why replacement costs can vary so much, depending on which coil fails, where it’s located, and how complex the repair is.
HVAC Coil Replacement Cost
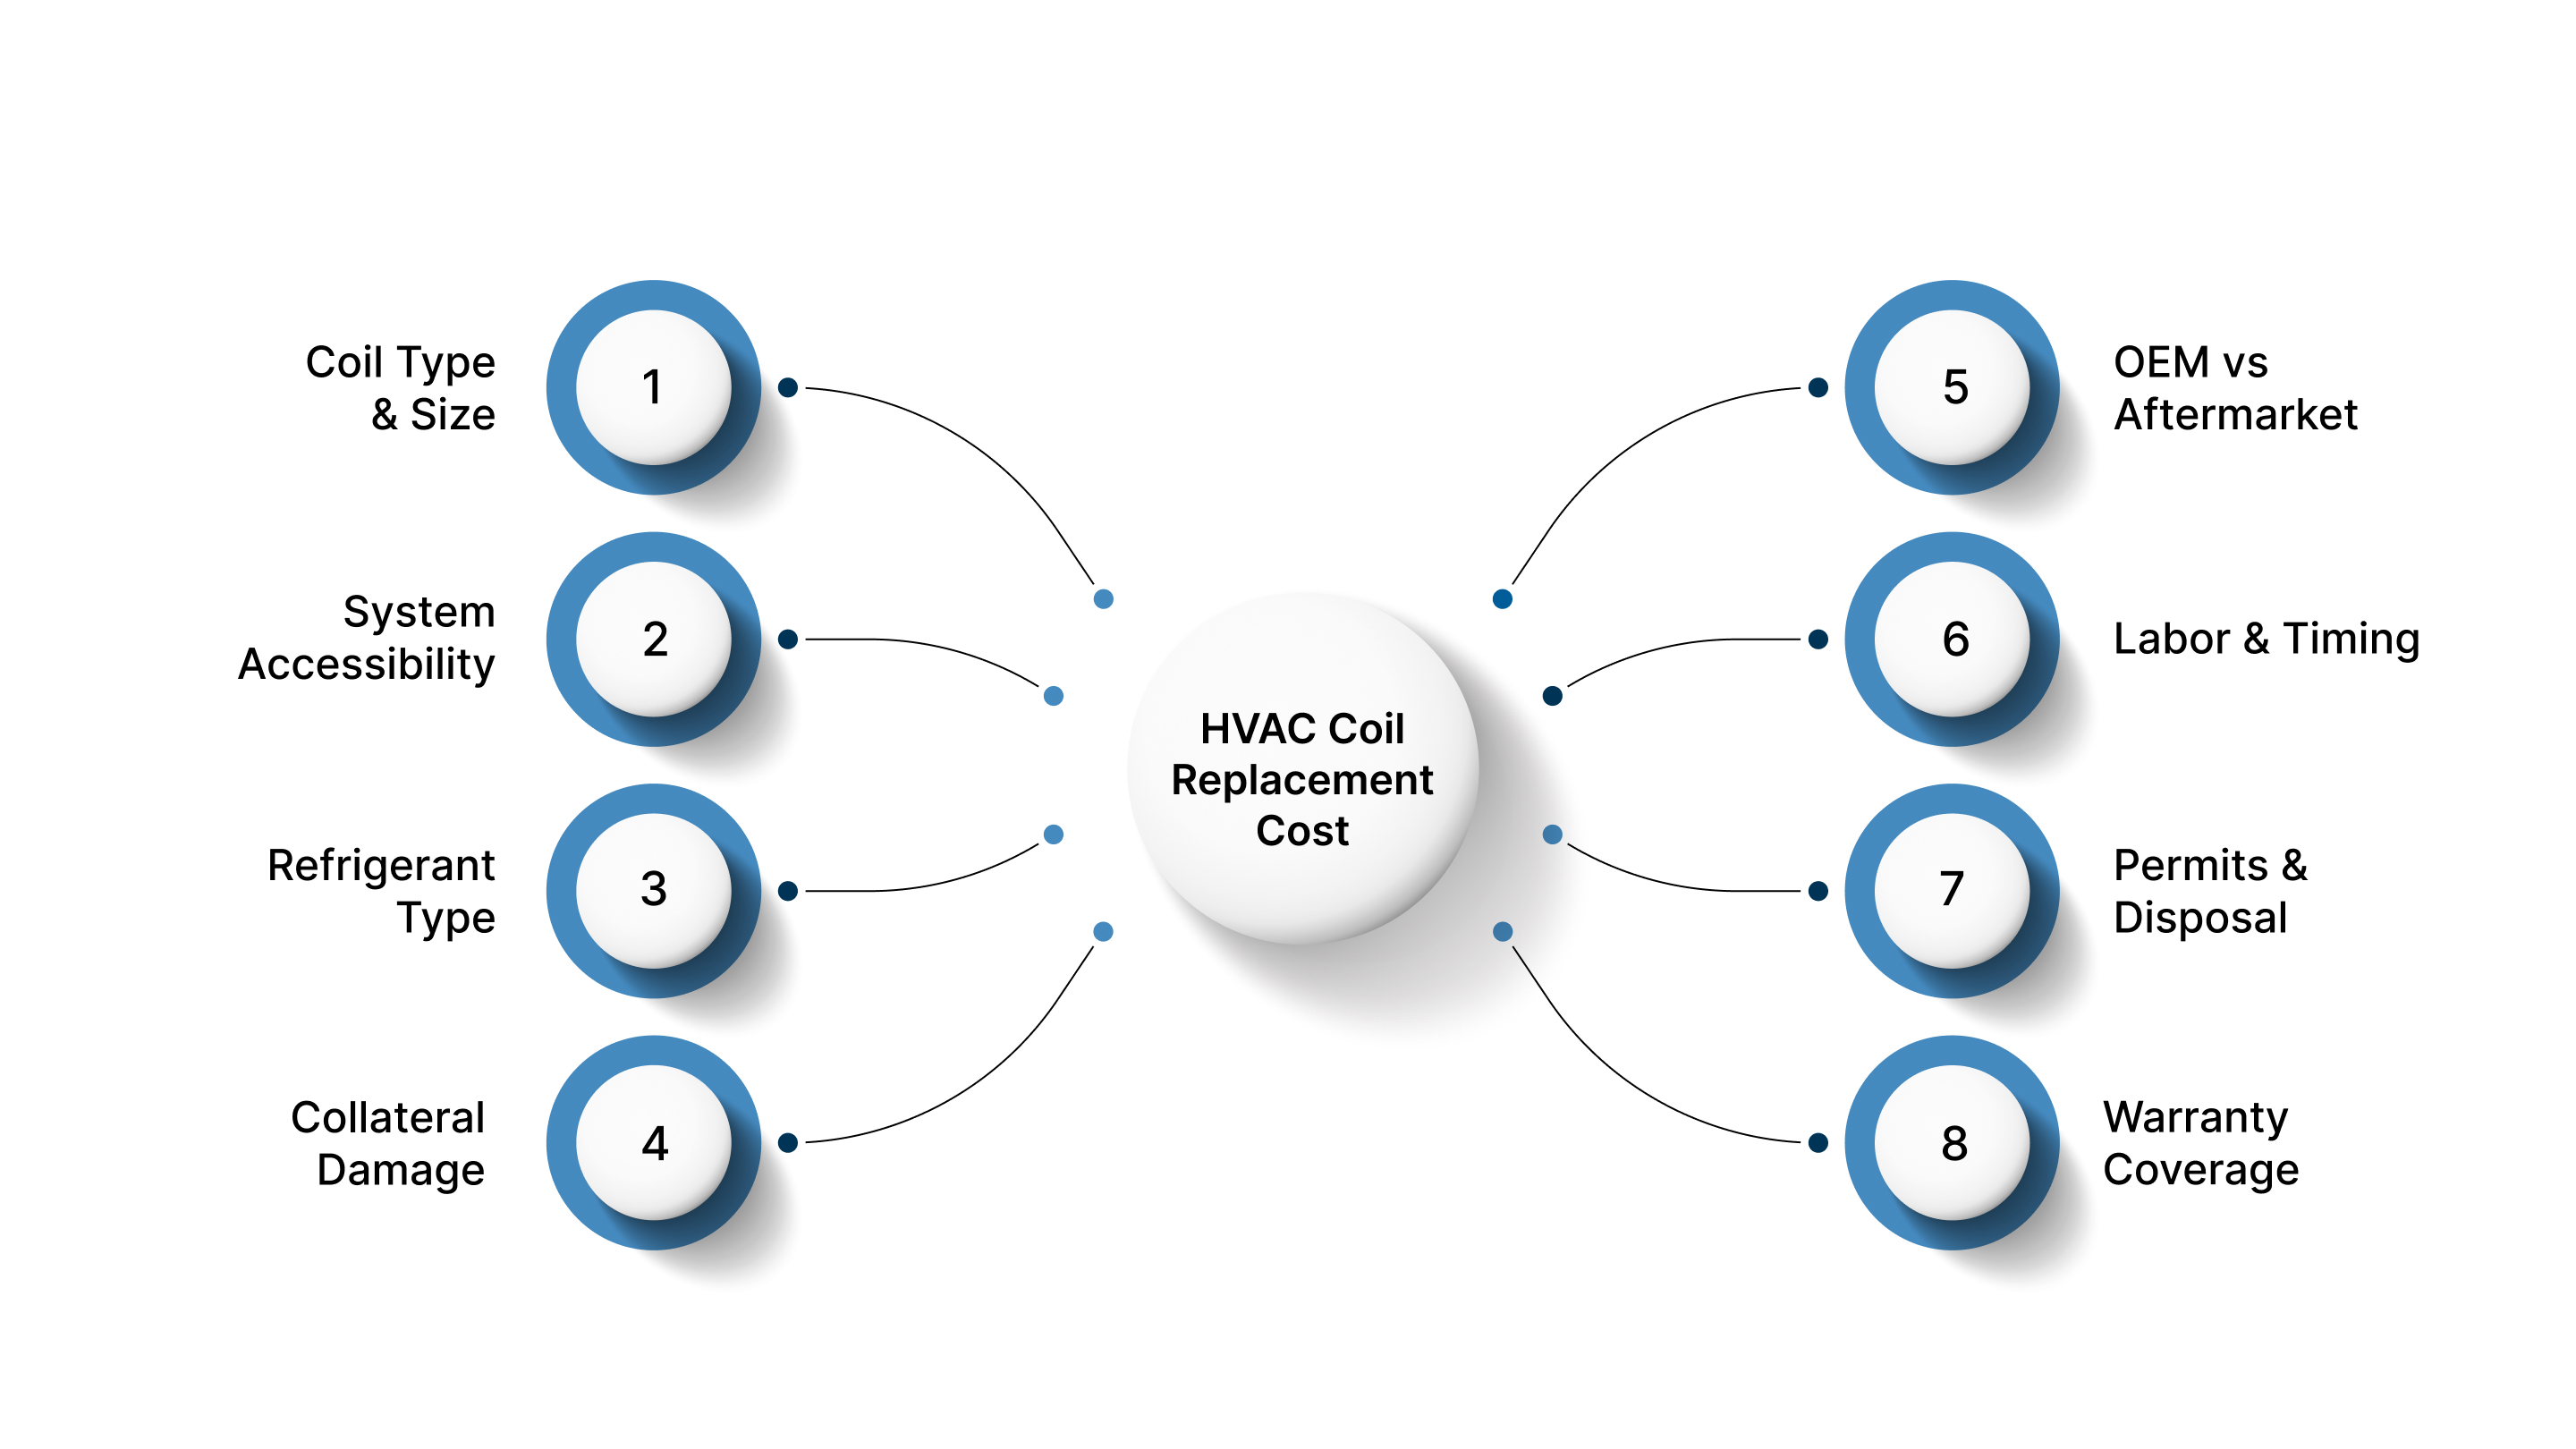
You can usually expect an HVAC coil replacement to cost between $600 and $2,700. Prices vary widely based on access, system type, and repair complexity. Here’s what really affects that final number:
Coil type and size: Larger systems need bigger coils, which increase both parts and installation costs.
System accessibility: Coils located in attics, crawl spaces, or sealed air handlers require more time and labor.
Refrigerant type: Older R-22 systems are more expensive to repair or recharge than modern R-410A systems.
Collateral damage: Corrosion, leaks, or compressor strain often add to the total repair bill.
OEM vs aftermarket parts: OEM coils cost more but ensure a perfect fit and warranty support; aftermarket coils are cheaper but may require modifications.
Labor rates and timing: Emergency or peak-season repairs come with higher service fees than off-season work.
Permits and disposal: Proper refrigerant recovery and disposal are legally required, adding minor but necessary costs.
Warranties and coverage: Extended warranties or protection plans may raise initial costs but save money in future repairs.
Knowing what drives the cost is only half the story; the next step is recognizing the signs that tell you it’s time for a replacement in the first place.
Signs Your Coil Needs Replacing
Coil issues rarely happen overnight. Most start with minor inefficiencies, restricted heat transfer, small leaks, or bent fins that quietly raise energy use and strain other parts.
Catching these early avoids costly repairs and keeps replacements predictable. According to the U.S. Department of Energy, dirty or faulty coils significantly increase electricity use, so early detection also saves on bills.
Below are clear, non-repetitive signs to help you decide which need immediate service and which can wait for a scheduled diagnostic visit.
Critical Warning Signs (Need Immediate Attention)
These issues can cause serious system damage or refrigerant hazards if ignored.
Hissing or bubbling sounds near the indoor unit — often signal a refrigerant leak from the evaporator coil. Leaks require licensed handling and can’t be patched in the long term.
Ice buildup on the coil or refrigerant lines — indicates low refrigerant or airflow issues. Running the system in this condition risks compressor burnout.
Strong chemical or musty odors from vents — may point to refrigerant oil leaks, coil corrosion, or biological growth; all of which need prompt inspection.
Performance Red Flags (Book a Diagnostic Soon)
These symptoms don’t stop your system immediately, but show that efficiency and comfort are already affected.
Weak or uneven cooling — air feels less crisp, or certain rooms stay warmer than others, suggesting restricted heat transfer.
Energy bills are climbing unexpectedly — a sign your coils are dirty or underperforming, forcing the system to work harder.
Frequent short cycling — when your AC turns on and off too often, it could mean the coils can’t manage heat flow efficiently.
Early Wear Indicators (Monitor Before It Worsens)
These are subtle signs that your coils are wearing out and may need to be replaced soon.
Needing frequent refrigerant top-ups — recurring “gas refills” almost always mean there’s a leak, often in the evaporator coil.
Corrosion or pinholes on the coil surface — a classic sign of formicary corrosion caused by household chemicals or moisture.
Outdoor coil covered in dirt or bent fins — can lead to overheating and pressure imbalances; cleaning may help, but damage often worsens over time.
Quick Homeowner Checks (Before You Call a Pro)
These simple steps help you rule out easy-to-fix problems before scheduling a service call.
Check the air filter — a clogged filter restricts airflow, mimicking coil failure symptoms. Replace if dirty.
Inspect outdoor clearance — remove leaves, grass, or debris around the condenser to ensure proper ventilation.
Observe air from vents — if airflow feels weak or warm, note whether the issue is throughout the house (evaporator) or mainly outside (condenser).
While understanding the process helps you prepare, choosing the right professionals ensures the job is done safely, efficiently, and built to last.
Abba HVAC: Licensed, Local, and Always Ready 24/7
Choosing the right contractor for your HVAC coil replacement is just as crucial as the coil itself. A good contractor ensures proper installation, long-term system efficiency, and full compliance with safety standards. That’s why going with a licensed, local, and experienced team like Abba HVAC makes all the difference.
Here’s why they’re the right fit for the job:
Licensed & Insured: In operation since 2007, Abba HVAC holds all required Texas licenses and insurance, ensuring professional, compliant work.
Local Expertise: Based in Greater Austin, they understand the unique cooling and humidity challenges of Central Texas homes and businesses.
24/7 Availability: Emergencies don’t wait for business hours. Abba HVAC’s round-the-clock response ensures you’re never left in the heat.
Comprehensive Services: They handle HVAC, plumbing, and basic electrical work, making them a one-stop solution for comfort systems.
Experienced Leadership: With 20+ years in HVAC and construction, their leadership team ensures every technician upholds high service and quality standards.
Energy Efficiency Focus: From coil replacements to full tune-ups, they prioritize energy-efficient solutions that lower utility bills and extend system life.
Once you’ve chosen a trusted contractor, it helps to know what actually happens during a coil replacement so you can be prepared and informed throughout the process.
What to Expect During a Coil Replacement
A coil replacement isn’t just swapping a metal partit’s a precise repair that keeps your entire HVAC system running efficiently. A trained technician will diagnose the issue, remove the damaged coil, test for leaks, recharge the refrigerant, and confirm everything runs smoothly.
Here’s a simple, step-by-step look at what happens during the process:
Initial Inspection: The technician confirms the coil issue, checks refrigerant levels, and inspects connected components for damage.
Estimate & Scheduling: You’ll receive a detailed quote covering parts, labor, and refrigerant, followed by a scheduled appointment.
System Shutdown: Power to the HVAC unit is turned off to ensure safety before work begins.
Refrigerant Recovery: The existing refrigerant is safely removed and stored for proper disposal or reuse.
Coil Removal: The faulty coil is carefully disconnected and removed, with the surrounding parts inspected for wear or corrosion.
New Coil Installation: The new coil is fitted, sealed, and connected using precise brazing techniques to prevent leaks.
Pressure & Leak Testing: The system is tested for any leaks or pressure irregularities before sealing it up.
Vacuum & Moisture Removal: A deep vacuum clears air and moisture from the system to prevent future performance issues.
Refrigerant Recharge: The correct type and amount of refrigerant are added for optimal performance.
Final Run & Cleanup: The technician restarts the system, checks cooling efficiency, cleans up the workspace, and provides a service summary or warranty details.
Knowing what to expect during the repair is essential, but knowing how to save money while ensuring quality service makes the experience even better.
Tips to Save Money and Avoid Overpaying
When it comes to HVAC repairs, costs can spiral faster than you expect, especially if you’re unsure what’s necessary and what’s just upselling. The good news? A few smart decisions before and during your coil replacement can keep your expenses firmly in check.
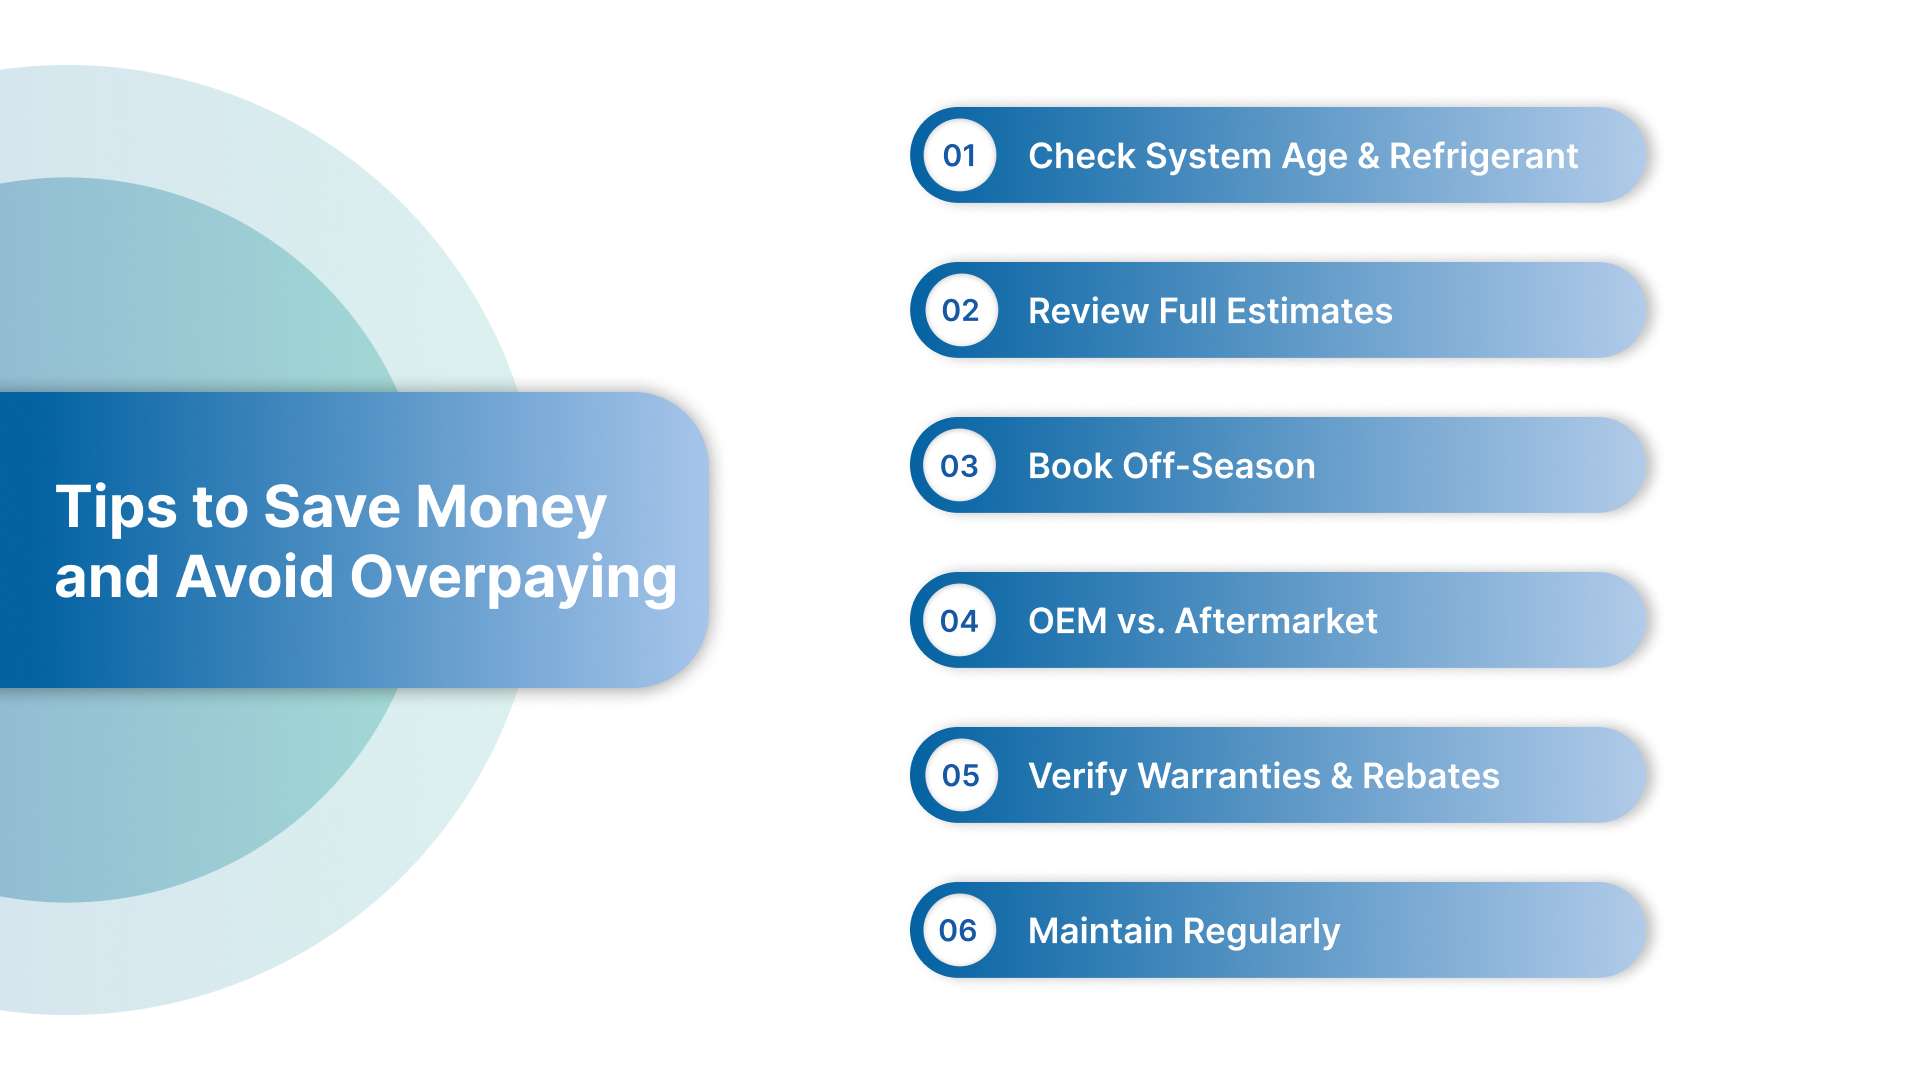
From choosing the right time to schedule service to comparing what’s really included in each estimate, here are simple but powerful ways to save money and avoid overpaying.
Check your system’s age and refrigerant: Older units using phased-out refrigerants often cost more to fix than replace, so upgrading early can save you money in the long run.
Compare detailed estimates, not just prices: A cheaper quote isn’t always better; always review what’s included to avoid hidden costs or poor-quality work later.
Schedule your replacement off-season: Spring or fall appointments can help you lock in better prices and faster service before peak demand hits.
Weigh OEM vs aftermarket parts wisely: Original coils fit perfectly and protect efficiency, while aftermarket ones may save upfront but risk higher running costs.
Confirm warranties and rebates: Knowing what’s covered, parts, labor, and potential rebates, helps you plan smart and cut down on unexpected expenses.
Invest in regular maintenance: Simple upkeep keeps your coils clean, reduces repair frequency, and helps you avoid costly emergency calls.
Wrapping Up
A failing HVAC coil can quietly drain efficiency, raise bills, and put extra strain on your system long before it breaks down. At that point, timely replacement isn’t just maintenance; it’s protection for your comfort and investment.
Working with a licensed, local team like Abba HVAC ensures your repair is handled with precision, care, and long-term reliability in mind. Their 24/7 availability, certified technicians, and deep understanding of Texas homes make them the right choice when performance and peace of mind matter most.
Ready to restore your system’s cooling power? Contact Abba HVAC today for expert coil replacement and trusted service that keeps your home running efficiently all year round.
FAQs
1. How much does it typically cost to replace an HVAC coil?
Most homeowners spend between $600 and $2,700, depending on the coil type, unit size, accessibility, and refrigerant type. Complex or older systems can cost more.
2. Can I replace just one coil instead of both?
Yes, but it’s not always ideal. Replacing only one coil can cause efficiency mismatches if the other is old or uses a different refrigerant. A technician can confirm compatibility.
3. How long should HVAC coils last before needing replacement?
With regular maintenance, coils last 10 to 15 years. Factors like humidity, air quality, and cleaning frequency affect lifespan.
4. What happens if I ignore a damaged HVAC coil?
A failing coil can cause refrigerant leaks, poor cooling, compressor damage, and higher energy bills, often leading to costlier full-system repairs later.
5. How can I save money on HVAC coil replacement without compromising quality?
Work with a licensed, experienced contractor like Abba HVAC, who accurately diagnoses, uses high-quality parts, and ensures proper installation. This will help you avoid repeat repairs and long-term costs.